How To Use Facebook Live
Facebook Live is an incredible tool for reconnecting with your Facebook audience and expanding your reach beyond your existing customer base.
It’s free to use and once you get the hang of it, it’s simple to produce great content, so why not give it a try? If you’ve never created a live video on Facebook, keep reading for the 10 basic steps to go live.
Step 1
First, make sure you’re logged into the Facebook account (the one that you want to stream from) on your mobile device.
Navigate to your timeline, which is the far left button on the Navigation bar.

Step 2
Towards the top of the page, find the Options Navigation bar and click on the “Live” button:

Step 3
Facebook will ask to access your camera and microphone. Make sure you click “OK.”
Step 4
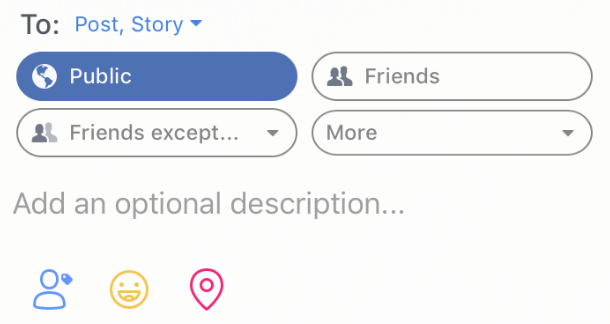
Before you go live, you’ll have the option to add a description of what you’ll be recording. Make sure you add a description because:
- Facebook users will be more likely to click on the video if they know what it is about.
- Your video could come up when people are searching for something related to your description.

Step 5
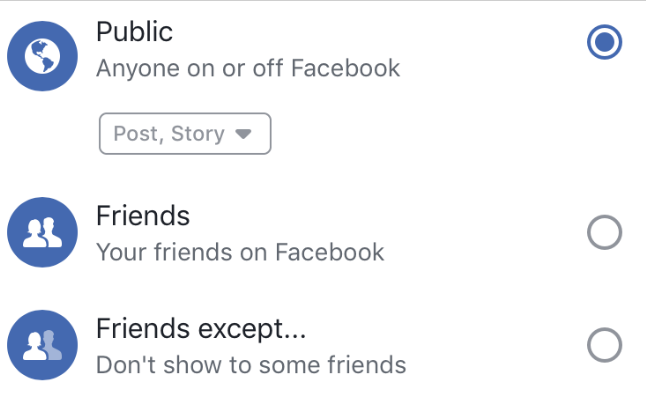
Next, you can choose who you would like to view your live video. To allow anyone to view the live video, click “Public.”

Step 6
Once you choose who can see your live video, click the dropdown below that setting and choose whether you want to just post to your Facebook Story while you are live, or if you want the video to post to your timeline and appear after the recording is over.

Step 7
Now that you’re all set up and ready to go, click “Start Live Video.” While you’re recording, you’ll be able to how many users are engaged with your video in real-time!

Step 8
When you’re ready to end the video, click “Finish.”

Step 9
Finally, to post your video to your Facebook page, click “Post.”

Step 10
Congratulations! You’ve created your first Facebook Live video! You can check out Facebook Insights for engagement metrics to see how users interacted with your video through likes and reactions, comments, shares, and overall views. If your video turned out awesome, consider boosting it to get even more views.
So you’ve created a Facebook Live video – now what? You’ve attracted new and existing customers to your Facebook page, but why stop there?
We’re providing you all kinds of tips on social prospecting and social media outreach in our free Social Media Handbook, below! Take a look!
